Data Loader is a native platform application for importing data. Use it to insert, update, upsert, or delete Salesforce records.
Table of Contents
Download the Data Loader Guide in PDF.
Installation
Before using the DataLoader, make sure you add the following url to the Remote Site Settings list (Setup->Administration Setup->Security Control->Remote Site Settings)
https://powerloader.[Server].visual.force.com
Where [Server] is your specific Salesforce instance server. You can find it in your browser address bar, for example if your Salesforce URL is
https://na8.salesforce.com
Then your server is na8, and you need to add the following to the Remote Site Settings:
https://powerloader.na8.visual.force.com
General Usage
1. Select CSV File To Load
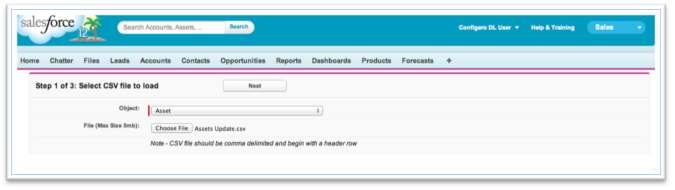
Object
The object picklist displays all the standard and custom objects in your organization. Select the object you would like to update.
File
The Choose File button will open a file selection dialog. Browse you local machine for the file you would like to use to update the object selected.
- Data Loader accepts CSV (comma separated values) files
- The file must be UTF-8 encoded
- Lines separated by CRLF
- Header line with column names
- Fields containing line breaks (CRLF), Quotes or Commas must be put in double quotes
- If a field is quoted and contains a quote it can be escaped with a second quote
Data Formats Supported
Boolean
- True values (case insensitive) = yes, y, true, on, 1
- False values (case insensitive) = no, n, false, off, 0
Date Formats
We recommend you specify dates in the format yyyy-MM-dd HH:mm:ss
- yyyy is the four-digit year
- MM is the two-digit month (01-12)
- dd is the two-digit day (01-31)
- HH is the two-digit hour (00-23)
- mm is the two-digit minute (00-59)
- ss is the two-digit seconds (00-59)
The following date formats are also supported:
- ISO8601 format -
- yyyy-MM-dd hh:mm(:ss) where :ss is optional
- mm/dd/yyyy h:m ampm
Note the following tips for date formats:
- Dates will be stored based on the users timezone setting.
Double
Standard double string
ID
A Salesforce ID is a case-sensitive 15-character or case–insensitive 18-character alphanumeric string that uniquely identifies a particular record.
Integer
Standard integer string
String
All valid XML strings; invalid XML characters are removed.
2. Field Mapping

Inserting, Updating, or Deleting Data
- Select the Operation Type:Insert, Update, Upsert, Delete
- Upsert is a combination of inserting and updating. If the record matches an existing record based on the match field (see below) then the record is updated, otherwise it is inserted.
- Match on Field: If you are performing an Update, Upsert, or Delete your CSV file must have an ID column to match against. The listbox will show a list of fields from the selected object that can be used for matching.
(you must also map the selected field in the mapping step)
Data loader can match on the following types of fields:- Salesforce record ID (Id)
- External Id – a custom field with the “External ID” attribute
- Batch size: Data loader will commit the updates in batches of records. If you are updating a large number of records then you may want to increase the batch size to improve performance.
- Save Mapping: When checked, Data Loader saves the mapping associated with the CSV file and will use the same mapping the next time a file with the same name is loaded.
Mapping
In order for data loader to update the selected object in Salesforce you must map the columns in your CSV file to fields on the selected object.
On the Field Mapping page under the Options / Available Fields section data loader shows a list of fields that have not been mapped for both the CSV file and the selected Salesforce Object.
Data loader will automatically map fields where the column name in the CSV file matches a field name on the object.
To map the remaining fields, select a field in the CSV Fields list and the corresponding field in the Object Fields list and then press Map. A new row will show in the Mapped Fields section.
Mapped Fields
The mapped fields section shows fields that have already been mapped. If there are fields that you do not want to update or the mapping is incorrect, click on the Unmap button to remove the mapping. The fields will now be in the available fields listboxes to be remapped.
For look up fields and master detail fields a dropdown list will show in the Match on Field column. Select the appropriate field to match on based on the data in your file.
Once mapping is complete click on Next
3. Verify Data and Process

The Verify and Process page displays the operation, object and batch size at the top, and the data to be updated in an editable grid on the bottom.
The grid allows you to perform inline editing in addition to mass updates to the file data before you commit it to Salesforce. See Using the Grid for more details.
Once you have confirmed the data is ready to be saved to Salesforce and verified the operation is correct, click the save icon ![]() to update Salesforce.
to update Salesforce.
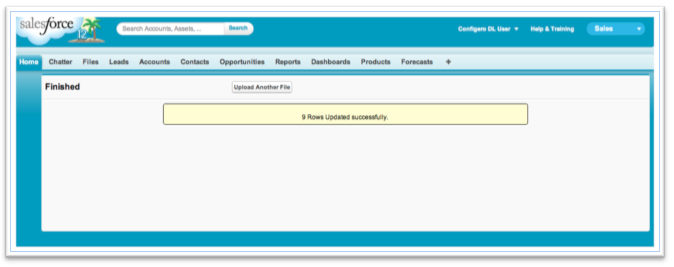
A successful update will show the Success page.
If there are errors, the Grid will display with the items that had issues marked. Move your mouse over the red icon to see the error details.

If there are a large number of errors or if you are not ready to make updates and try again you can export the results by checking the selection box (or select all) and clicking on the export icon ![]() .
.
